TABLE OF CONTENTS
- Pairing assets with ICQR labels
- Pairing imported assets with ICQR labels
- Scanning a VIN before pairing a label
Pairing assets with ICQR labels
From the main scan screen in the Vinpoint mobile app, tap the camera button to open scan mode.
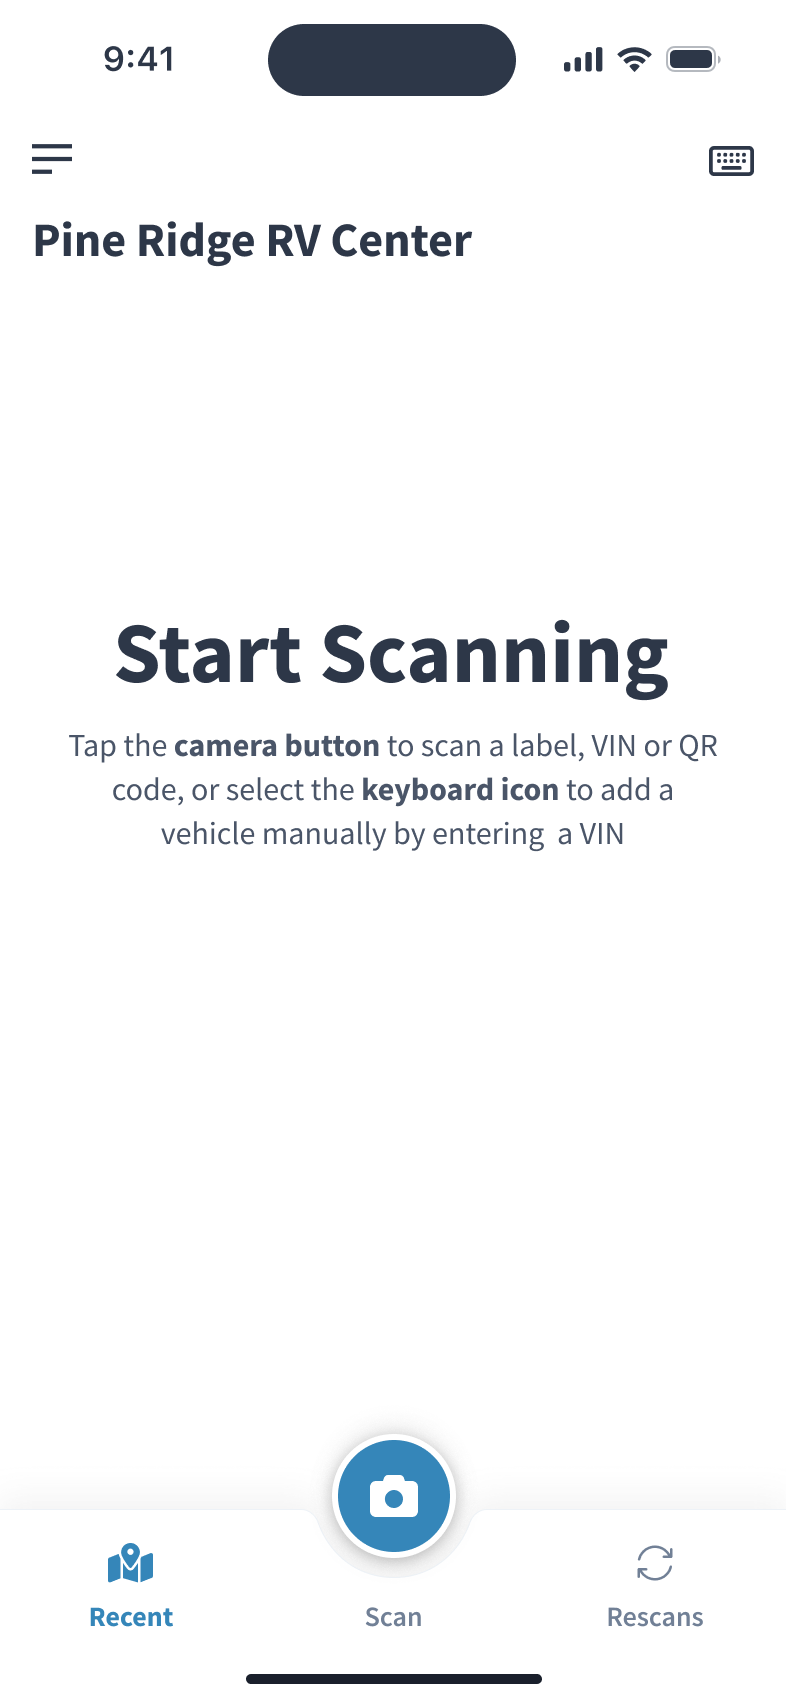
Scan an unused ICQR label to initiate the pairing process.
You should see a screen that says, "You've scanned an unpaired ICQR label, would you like to pair it with your asset now?"
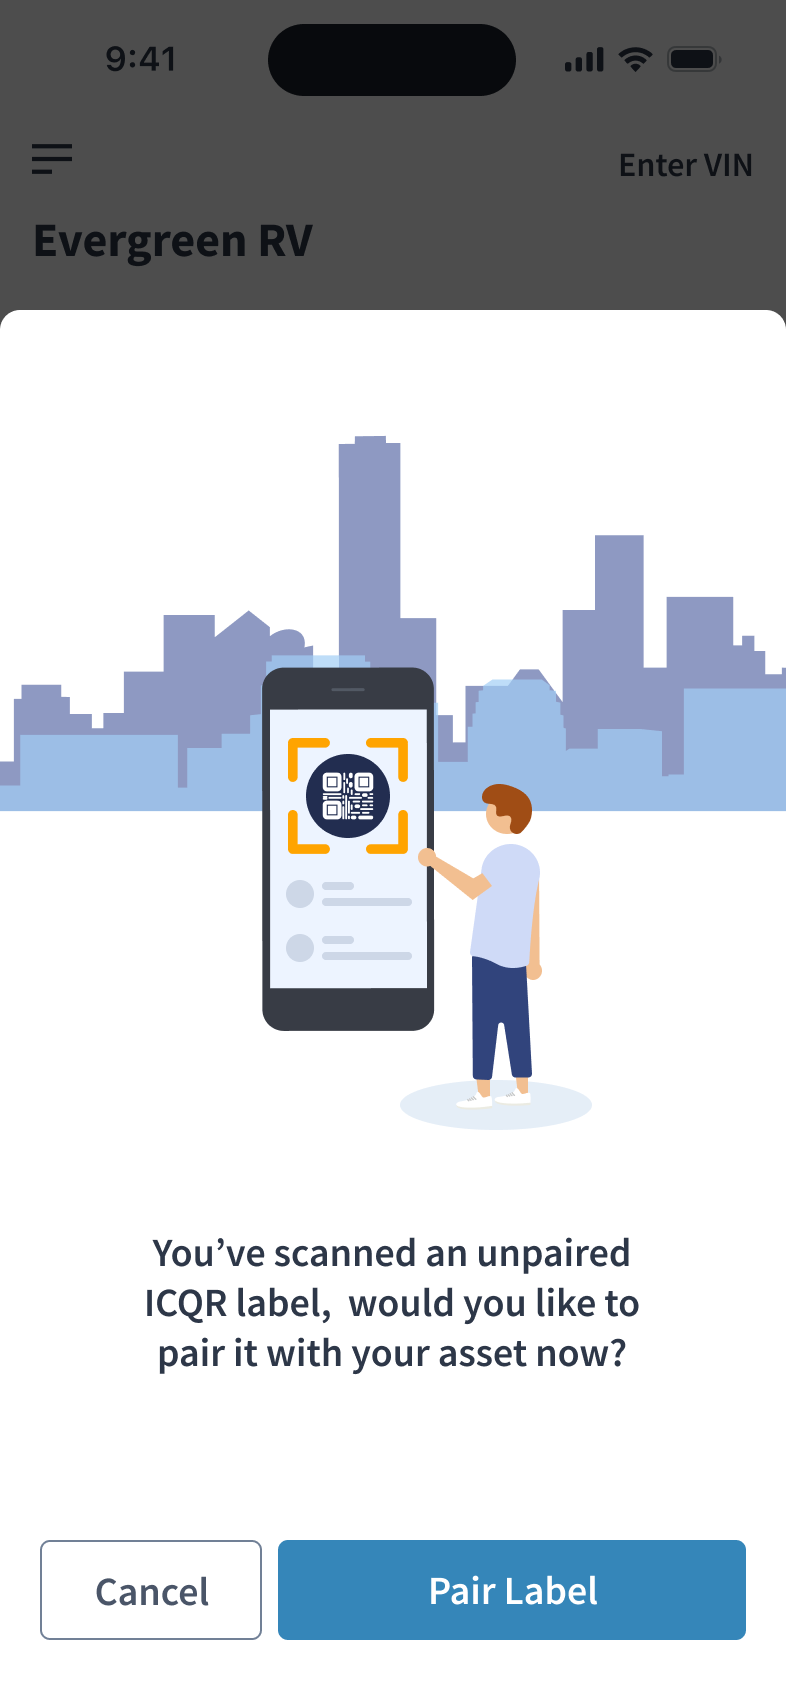
Note: If scanning the label takes you directly to the asset details screen, the label has already been paired with an asset. You’ll need to use a new, unused label instead.
Once you tap "Pair label" you'll arrive at a screen prompting you to enter an asset ID.
The Asset ID can be a VIN, HIN, SN, PIN, or any unique identifier your business uses to identify assets.
Enter an Asset ID or tap "Scan Asset Info" to use one of the Asset Info Scanner Modes.
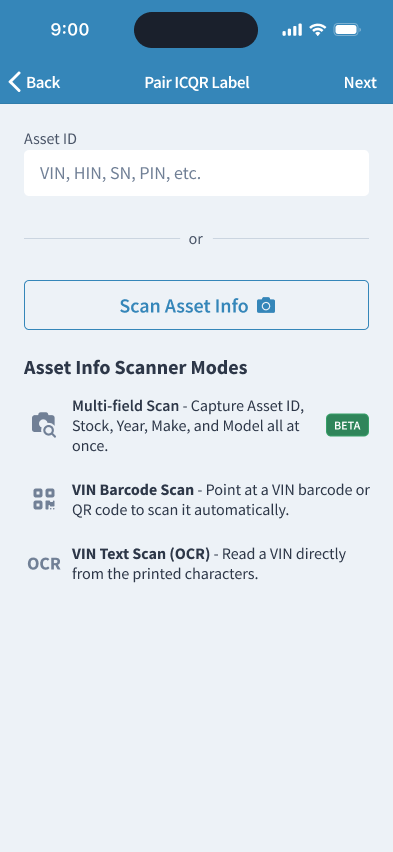
If you use the Multi-field Scan to populate the relevant fields check out How to use Multi-Field Scan (BETA) for help using that feature. If not, you have some fields to fill out. Let's start with the required ones.
First ensure the Asset ID looks correct.
Next, select the type of asset you are pairing from the list. This is required.
Then you can optionally add the asset's year, stock, make, model, color and any notes that might be relevant to the asset.
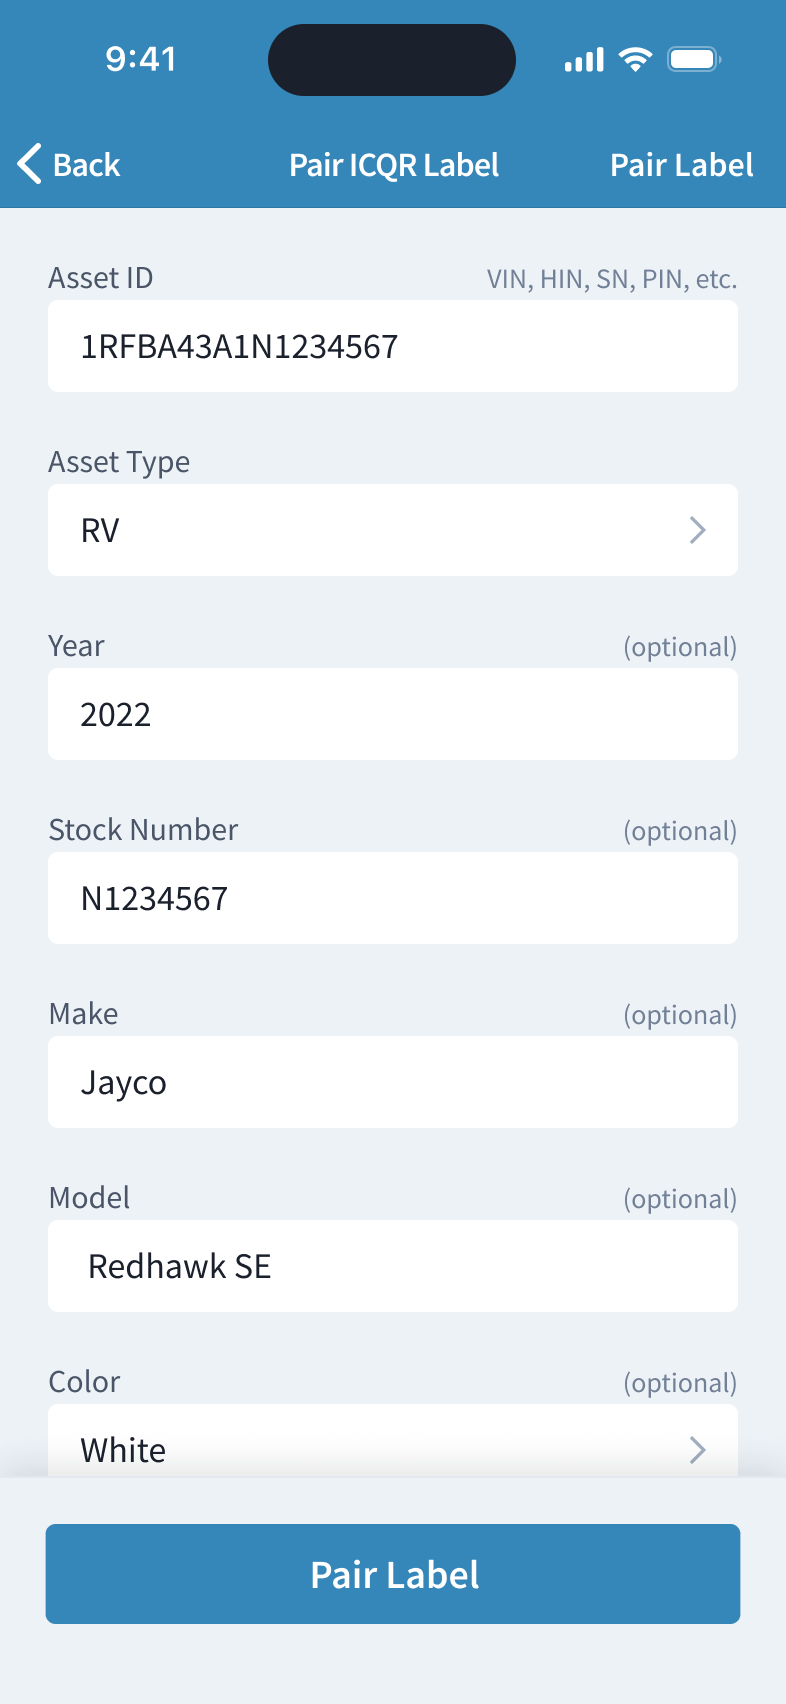
When you’re finished, tap “Pair label.”
You will receive a “Successful pair” notification once pairing is complete.
Now, when you scan the newly paired ICQR label, it will appear in your scan history. From there, you can tap on it to view the asset’s details.
Pairing imported assets with ICQR labels
After importing your inventory in Vinpoint Web, you're ready to pair each imported asset with an ICQR label.
From the main scan screen in the Vinpoint mobile app, tap the camera button to open scan mode.
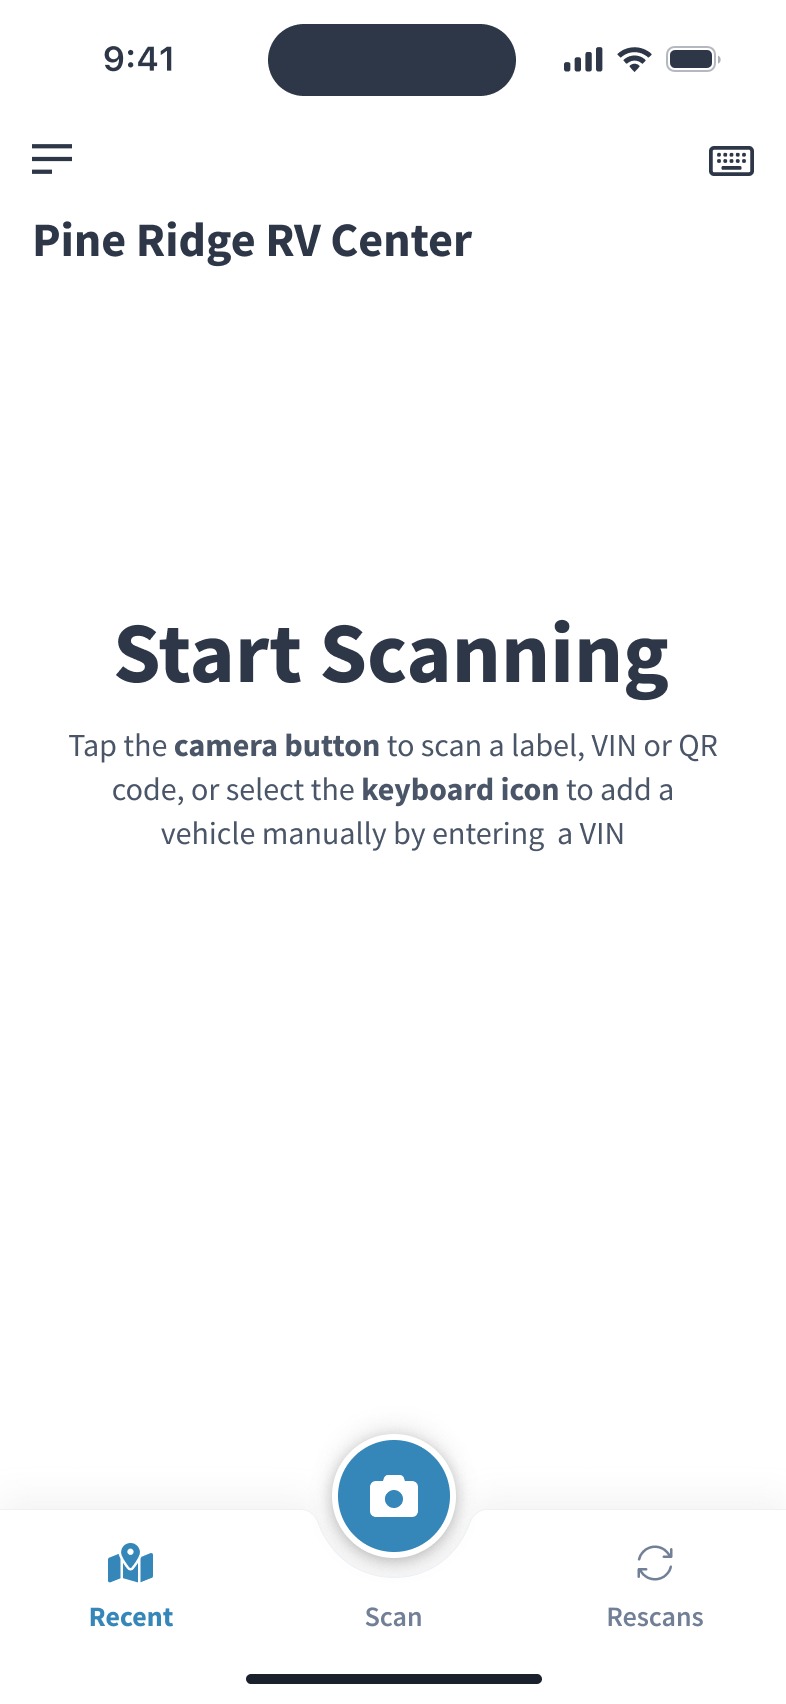
Scan an unused ICQR label to initiate the pairing process.
You should see a screen that says, "You've scanned an unpaired ICQR label, would you like to pair it with your asset now?"
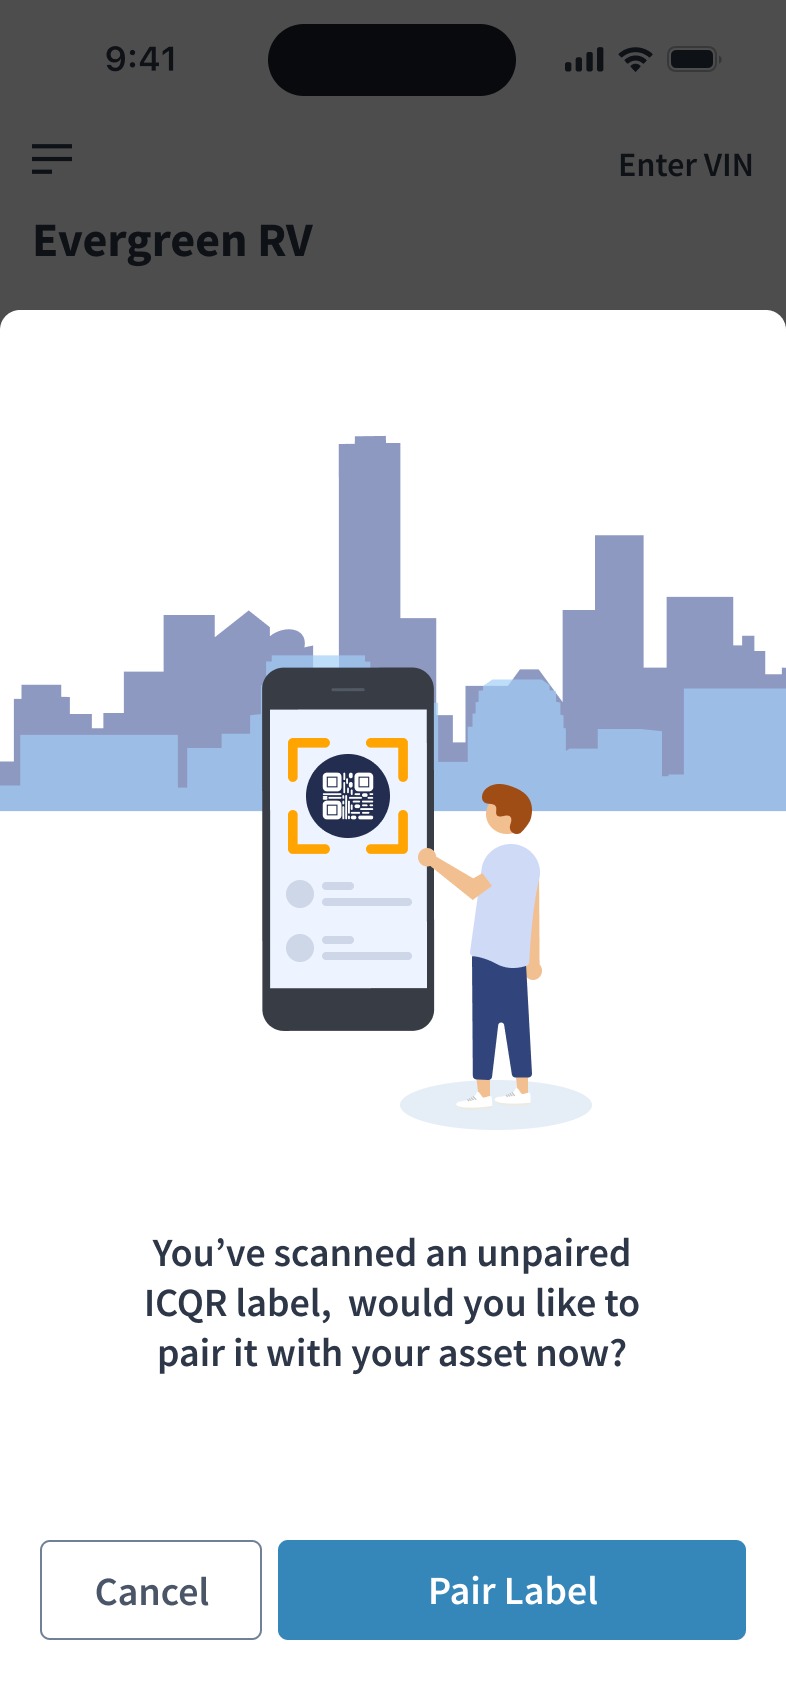
Note: If scanning the label takes you directly to the asset details screen, the label has already been paired with an asset. You’ll need to use a new, unused label instead.
Once you tap “Pair label,” you’ll be taken to a screen prompting you to enter an Asset ID.
Enter an Asset ID or tap "Scan Asset Info" to use one of the Asset Info Scanner Modes.
The Asset ID must match exactly what you entered during import in order for the system to find it.
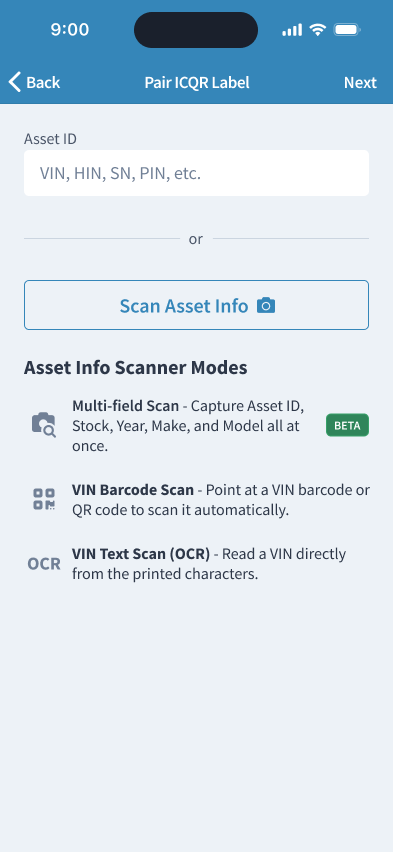
If you use the Multi-field Scan to populate the Asset ID check out How to use Multi-Field Scan (BETA) for help using that feature.
After entering the Asset ID, tap “Next.”
If the Asset ID is correct, you will see a notification asking if you would like to "Pair to existing Asset?"
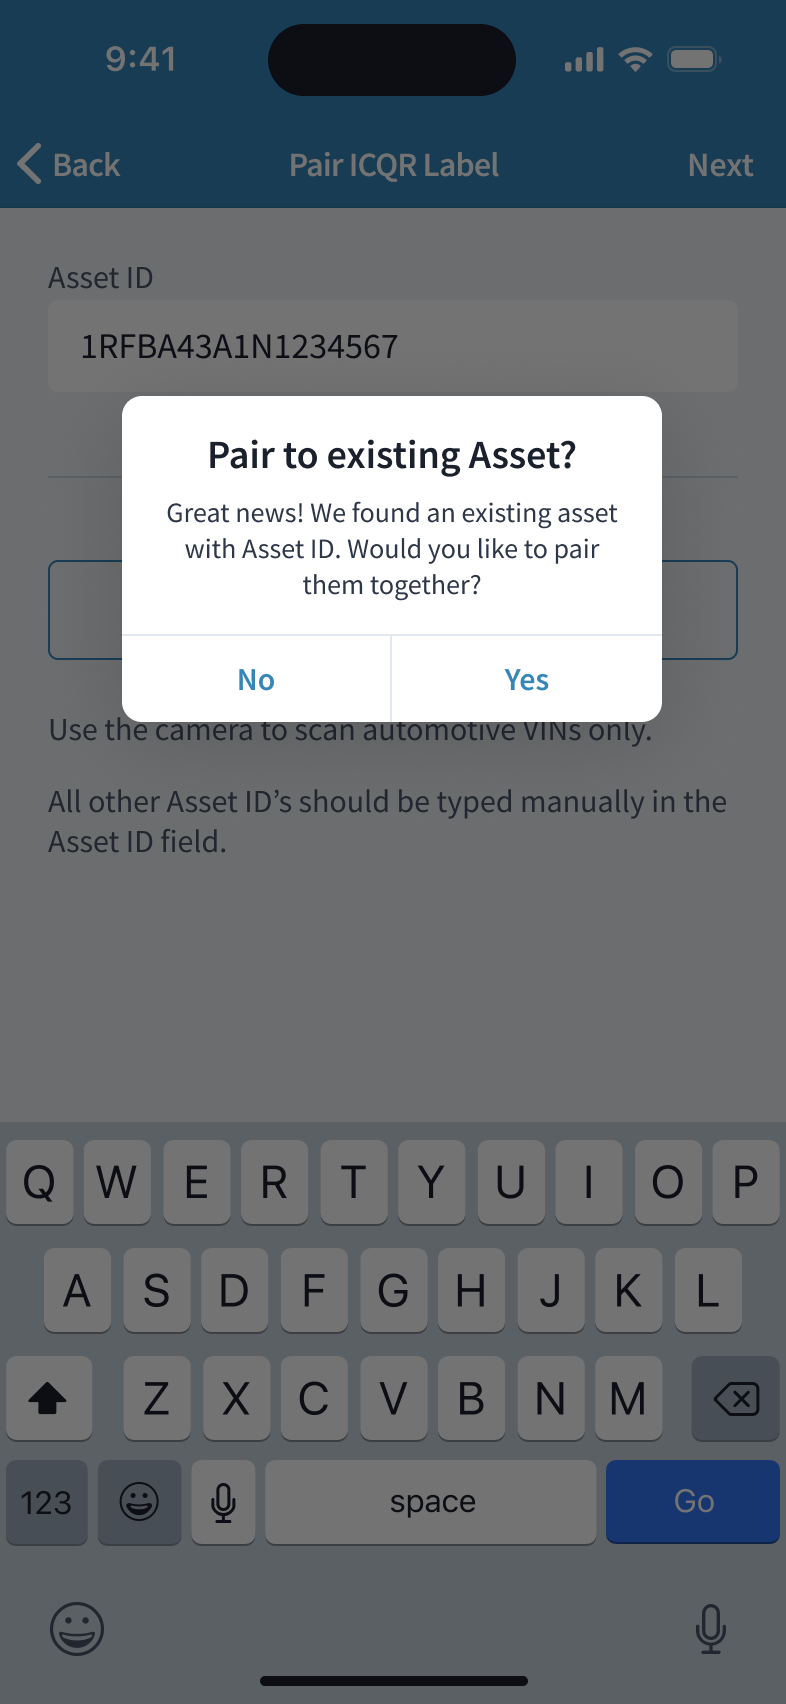
Tap "Yes" to pair the ICQR label with the previously imported asset.
When you’re finished, tap “Pair label.”
You will receive a “Successful pair” notification once pairing is complete.
Now, when you scan the newly paired ICQR label, it will appear in your scan history. From there, you can tap on it to view or edit the asset’s details.
Scanning a VIN before pairing a label
From the main scan screen, you can also scan an asset's VIN instead of an ICQR label. If that ID isn't already in your inventory, you'll see Pair asset with ICQR Label? along with the ID you scanned. Tap Pair Asset to open the pairing screen with the Asset ID already filled in, or Cancel if you scanned the wrong item.
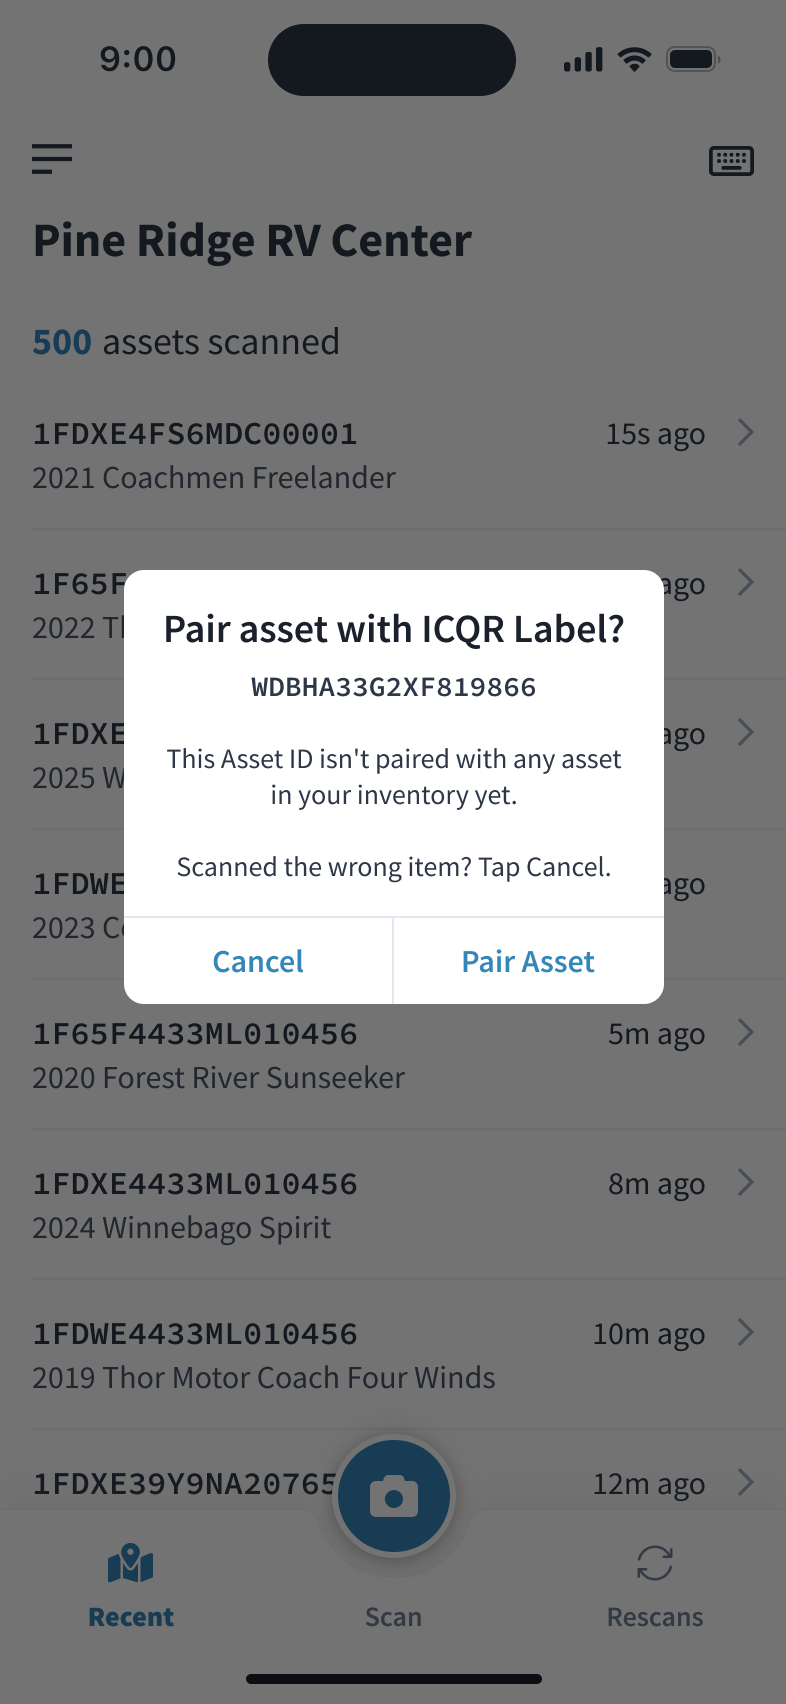
Before you continue, confirm the ID belongs to the unit itself. Many units carry more than one ID, and scanning the wrong one creates a record that won't match the rest of your inventory.
For new inventory, we recommend pairing an ICQR label at the same time you add the asset, as described in the Pairing assets with ICQR labels section above. That way the asset is labeled and trackable from the start.
If you have an asset in your inventory that isn't paired with a label yet, follow the steps in the Pairing imported assets with ICQR labels section above.
Was this article helpful?
That’s Great!
Thank you for your feedback
Sorry! We couldn't be helpful
Thank you for your feedback
Feedback sent
We appreciate your effort and will try to fix the article